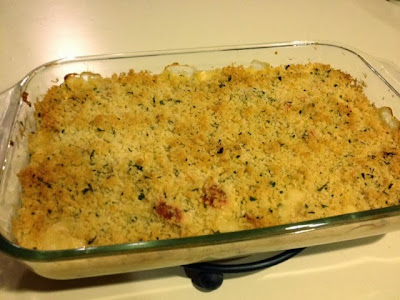
Delicious Spaghetti and Meatballs!

Spaghetti in our house is usually pretty plain. In fact it consists of pasta, store brand sauce, and if we're lucky some ground beef. We usually...if not always have it because I'm rushed for time, or I forgot to pick up a needed ingredient from my previous shopping trip that goes to a better (most of the time yummier) meal. Its my quick go to meal when I'm in a pinch.
Last night, after attempting 3 other meals, then realizing I was missing one ingredient for each, decided I would try and tackle spaghetti and meat balls...I had time, and wasn't rushed either (which is a big thing in our house with 5 littles.) I'm not know to make meat balls, since they take time to make, roll, cook yada, yada, yada...
So to my (and my entire families) surprise they came out REALLY good. (like crazy good folks)

I can't keep this recipe to my self. I had the items on hand, and I had time...so I started throwing in some of this and that into bowl and mixed it all together to made these...

**Update**
I bought some sub sandwich rolls, and made meat ball sandwiches-delicious!! You would just cook the meat balls the same way, minus the spaghetti noodles, toast the sandwich rolls, scoop some meatballs and sauce on, and top with parmesan cheese. (Ive also seen people add slices of provolone cheese to their meatball subs.)


Delicious Spaghetti and Meatballs

1.5 lbs ground beef
2 cloves garlic minced
2 eggs
1/2-3/4 cup plain bread crumbs
a little salt and pepper
3 tabl. milk
2 tabl. olive oil
Your fav. store bought spaghetti sauce
1 lb spaghetti noodles


Cook pasta according to the directions. In a bowl, mix together everything but the olive oil, sauce, and noodles. Heat a large pan with the oil over med. heat. Using a cookie scoop, (so they're all the same size) scoop and shape meat balls into balls, and drop them into the hot pan.
Allow them to brown on each side for 3 minutes, then pour in your sauce, and simmer covered for 20 min.
Serve over spaghetti, and enjoy!

Elf on the Shelf-Jesus Style


We love our Elf on the Shelf. Her name is Tinsel. She shows up on our door step each December 1st, rings our door bell, and awaits us to answer the door.
I've always felt like Elf on the Shelf makes Christmas more about behaving so that Santa will GIVE you gifts. And less about Jesus' Birth, and giving to others. Thats why I'm happy to have found Elf on the Shelf Jesus Style.
I've been wanting our elf to incorporate Jesus into our Holiday, and encourage our children to behave, and treat others with kindness, not to just get gifts, and not only until Christmas is over, but because Jesus wants us to treat others in a way that He can shine through us all year long. And it's been hard finding time with 5 little kiddos, homeschooling, activities... So I'm excited to have found this great blog that helps share Jesus with my kids, and takes some of the load off of me, with the cute printable that our els can leave out for our children to read.


Meet Tinsel, our sweet Elf, who Loves Jesus!


Hand Paint Flower

I'm like most moms, I love any art that involves hand or foot prints of my children. They are absolutely priceless, capturing their tiny hand size for me to look back on days when they are not so little. One day when my children are out of the house, and I'm old and slightly senile, I'll have my scrap book of my most treasure possessions to look back on and remember the days when I held these little hands.


Wipe Clutch Cases

A few months back, I had 4 friends who all had babies with in 6 months of each other. I wanted to get them a gift that they needed, but I also wanted to get them something cute. So I made each friend a wipe clutch. Stylish, practical, and hand made by someone they love. I also bought them a needed gift, I can't help shopping for baby items-those little new born outfits, toys, and pretty much everything that is mini is irresistible to me.


Fun Ideas to Help Make Christmas More Meaningful

I love this time of year. Its busy, packed with birthdays and holidays. Next weekend is Halloween, which means Christmas decorations come out soon, and this mama gets her shop on.


Now that we have 5 children, time seems to fly much faster. I want to make some amazing memories with my family, but I feel like we end up running out of time, and before you know it, Christmas is over, and the New Year begins. 

This year I'm going to do my best and be intentional about making memories, having fun, and celebrating Christ's Birthday. 

I'm a list person, I write lists out, rewrite them, and do a final draft cause thats the way I roll.
Here's my list of things to do with my family this fall/winter season.


Decorate for Christmas 
Play Christmas music
Make a "Thankful tree" with the kids
Go on walks 
Elf on the shelf
Cookie exchange party
Manger Craft
Pick a family ornament 
Pick an ornament for the new baby
Walk through our towns Christmas light neighborhood
Drive around and look at lights
Decorate our house with Christmas lights
Zoo lights
What Does God Want for Christmas board activity
Listen to Christmas music
Church's toy drive
Drive through nativity scene
Bake Santa cookies
Secret Santa
Watch our favorite Christmas classics; How the Grinch Stole Christmas, Home Alone 1 & 2, Rudolph     the Red Nose, Reindeer, Charlie Brown Christmas, The Santa Clause, The Nightmare Before    Christmas...
Bake for Family and Friends. I always make Toffee, cookies, do a cookie in a jar.
Read the story of Christmas in the bible
Ugly Sweater Contest
Family Ginger Bread House Contest
Make Home Made Christmas Bows
Name Of Jesus Ornaments
Birthday Cake for Jesus
Count Down to Jesus Birthday

Cherry Cheese Cake

  • Once again, I wanted to share a recipe that has been in my family for quite a while. We always have this dessert for Thanksgiving. And everyone expects it to be there because its our fav. This is the only cherry cheese cake that I like (I'm really picky when it comes to fruit pies/cakes). I've also sent this with my husband to company parties, and have been requested to make this several times since by his fellow workers, and even offered money to make it...when moneys involved you know its a good thing! lol!


  • Cherry Cheese Cake

  • Crust:
  • 1 1/2 c. graham cracker crumb*
  • 1/3 c. sugar
  • 1/4 c. melted butter

  • Filling:
  • 2 Pkgs. Softened cream cheese
  • 1/3 c. Sugar
  • 1 Tub cool whip
  • Topping:
  • 1 can Cherry pie filling/topping 

*With making this, use graham crackers and crush them up. If you use the pre-crushed graham crackers, it doesn't taste quite right.
Combine your graham cracker crumbs and sugar. Drizzle in the melted butter slowly, tossing the mixture well together. Spread in a 9"x9" glass baking dish, and press down evenly.

For the filling, beat the cream cheese, sugar and cool whip together. Spread over crust, and pour the cherry pie filling. Refrigerate for 1 hour before serving. 

You can use strawberry or blue berry topping. When I'm asked to make this by my hubbies work buddies, they usually request strawberry-its really yummy!

German Pancakes

"German Pancakers" are a BIG hit in this house. Its one of those recipes you try and think that no one would like it, then every LOVES it and wants more but you only made one pan so as mom you have to sacrifice your plate...Won't make THAT mistake again. I now have to make 2 batches to feed my family. Oh and be sure you have enough syrup. I always like to drowned my plate in a healthy dose of syrup. Syrup makes me happy lol!

6 eggs
1 c. flour
1 c. milk
1 tabl. vanilla
4 tabl. butter
Your fav syrup

Pre heat your oven to 350. Whisk eggs, add flour, milk and vanilla. Melt butter and pour in a 9"x12" glass baking dish and spread around the bottom. Pour your egg mixture in the baking dish and bake 40 min.
You'll know its done when it has large bubbles and is curled up on the sides.

Broccoli Casserole

  • This is by FAR the BEST ever broccoli casserole I have ever had the pleasure of eating! This recipe has been in my family for over 25 years. Not sure where it originated from, but holy moly is it good!
    Broccoli is one of my favorite veggies, so it is exciting to eat this. I know-
    weird-o right? I look forwards to this dish each Thanksgivingin fact my brother and I fight over who gets the left overs...why are there left overs when its supposedly the BEST by FAR you ask? Because I double, sometimes triple this recipe so I'll have leftovers and I'll be able to enjoy it the next day. So when you make it, you may want to double it...just sayin'!


  • Broccoli Casserole 

  • 1 1/2 C water
  • 1 stick butter
  • 4 tabl. diced onion
  • 1 bag frozen broccoli florets
  • 1 1/2 c instant rice
  • 1 can cream of celery soup
  • 1 8 oz. jar cheez whiz

  • Pre heat oven to 350. Bring water to a boil, add butter, onion, and broccoli. Boil for 5 min then remove from heat. Add rice and let stand for 5 minutes covered. Add soup, and cheez whiz. Bake 40 min. Uncover dish for the last 15 minutes if you want it crispier.

To Moms of One or Two Children from a Mother of Five

I happened to stumble across this article the other day, To Moms of One or Two Children from a Mother of Five and it was spot on. I have 5 young children, so the title alone caught my eye, anything about having 5 children catches my interest.

It made me see how far I've come in my "mothering stage" of life, or I should say how far God has brought me...sometimes dragged or carried me along, but He did get me here one way or another.

In the beginning when it was just my first and second child, things were much different. I depended on my self more, and depended on God with more surface type issues. As our family grew with more children, I noticed I couldn't handle it all on my own. Thats when I started depending on God more.

He began by gently chipping away at my selfishness. And I had-still have a lot of selfishness, but God was at work. Looking back I can see how far He's brought me, and looking forward I'm excited to see where He'll take me. He's making me reflect more of Him each day, and using my children to do so.

"Mothering is easier for me now than it used to be. For one reason: I need God more." I need God more! Don't we all? I know I can't do this on my own, like I used to try. Mothering is hard stuff. It isn't just about growing your kids to be responsible adults, its about introducing them to Christ, helping them to build a relationship with their creator, and eventually (hopefully) watching them as they take on the faith you have passed onto them, and make it their own, a relationship with God! 

Yes, I need God more, it seems like each day that goes by I need Him more and more!

Roasted Acorn Squash Soup

Delicious! That's what this soup is...was. I saw some acorn squash at the grocery store on sale and decided to have a go at making some soup with it. I've never had acorn squash soup before, and after this I know it will be on my menu often. Such a great fall lunch! You can have it for dinner too...but why wait?
My only disappointment was not making a double batch. Next time my friends!


My daughter recently had roasted pumpkin seeds, and when she saw the seeds inside the acorn squash, she asked if we could roast them...Ummm not sure if you can. Never heard of roasting them before, but now I'm curious and will search it.


Delicious recipes like this, makes me wish I were a better photographer. I can snap shots of my family and have them turn out great but with food...NOPE!  I hope you enjoy the recipe. 


Roasted Acorn Squash Soup

1 Acorn Squash
1 tabl olive oil
2 tabl butter
1/2 medium onion-chopped
1 garlic clove-minced
1-1/2 c. chicken broth
1/2 c. heavy cream
1/4 tea cinnamon
1/8 tea allspice
1/4 tea salt


Heat oven to 400F. Cut the acorn squash in half, scoop out the seeds with a spoon, and brush on 1 tablespoon of olive oil.
Roast the squash in the oven cut sides down for 45 min. Remove from oven and allow to cool for 15 min.
Meanwhile melt butter in a pan over medium low heat, and add onions. Sauté onions until translucent, then add the garlic. Cook about 2 min.
Scoop out the inside of the squash into a blender, add the onion/garlic mixture, and chicken stock and blend for 2 minutes. Add the seasonings, salt and heavy cream and blend for another 2 minutes.
At this point I added my finished soup to a pot to heat before I served it. And let me tell you, my kids ate this all! 2 of my kids are picky eaters, so I was surprised!

*There are so many things you can do to jazz this dish up, crumbled bacon, parmesan cheese,  roasted chopped cauliflower or carrots for more texture...

25 Quick DIY Halloween Decorations

I'm throwing a quick Halloween party this weekend, and only have 2 day to come up with themed food ideas, and fun decorations. I stumbled across these 25 DIY decorations that are inexpensive and easy enough that I can pull some off before the party. 


These are some of the the ones I'm planing on doing. Super cute ideas!

I'm also planing on making deviled eggs that look like eye balls, and a pumpkin that looks like it threw up guacamole served with purple chips. I'll snap some pics and post later. 


12 Encouraging Bible Verses for Homeschooling Moms

Being a mom who homeschools can be rough at times. We all have those days that drain us and leave us feeling like we've failed. So having an adequate supply of encouragement is essential. And where can we get better encouragement from than the bible? I stumbled across 12 Encouraging Bible verses for homeschooling moms, and thought I'd share them here.

I know I struggle some days where my kids aren't staying on task, or the littles are interrupting. Its nice to know we have a God who can refresh us.


Trick-or-treat Table

We celebrate Halloween. Its an exciting time in our house, where my husband and I stay up late eating some of the candy my kids have worked hard for. I especially like peanut butter cups, and those strawberry hard candies with the filling inside.
We like Halloween in our house. We all dress up, and get our best begging-for-candy-face on, and head over to our churches trunk-or-treat to reel in the good stuff.

Since we have 5 small children, we never get the chance to stay home and pass out candy. We're always out trick-or-treating ourselves, and I always feel strange since we decorate the outside of our house and aren't home to pass out candy.
So this year I decided to decorate a cute table and place a bowl full of candy for the trick-or-treaters to enjoy.


I found this picture on Pinterest, and thought it was a fun idea. I couldn't find a link to link it back to the original. But heres an idea of what I'm going for come Halloween.

Chocolate Pecan Toffee

I have been making this recipe for years now. Each Christmas, family and friend know what they'll be getting. Its a simple recipe, takes about 15 min and its done! Hard part is to wait until it cools to eat...It seems like f.o.r.e.v.e.r for it to FINALLY cool. (20 min in the frig)

2 c. (real) butter
2 c. white sugar
1 1/2 c. semi-sweet chocolate chips
1 c. chopped pecans
Candy thermometer

Get your stuff ready! I used a jelly roll pan...cookie sheet will work too. Layer it with foil and slightly spray some oil down on top.
In a pot over med heat (or slightly over) melt your butter, then add in the sugar. At this point your locked in and must continue to stir constantly, so if the baby has a dirty diaper make the hubby change him/her...your makin' candy...and candy is serious!
You'll want to bring it to a rolling boil, and allow it to get to the "Hard crack" stage 300-310 (15ish minutes). pour it in the prepared cookie sheet, spread it out a bit. (usually you don't have to spread it, it will spread its self out) sprinkle the chocolate evenly on top, and wait 2 min. Now the chocolate will be nice a melted. Spread the chocolate over the candy with a plastic spatula, or spoon...lick the spoon after spreading and evenly sprinkle the nuts on top. Here's the hard part, place it in the frig for 20 min to allow to cool. I tried to sneak a bite and burned my tongue...I have the patience of a 3 year old! After those grueling 20 min, you should be able to break it into pieces and enjoy (with out your tongue being burned!)


*I found I had to make a practice batch each year to find the right temp to get the candy to when cooking it. Each area will be different depending on the weather. If its humid you may need a lower temp maybe around 290, if its dry out, you may need a higher temp 310-315. Here where I am its usually dry, so I have to cook my candy till it reaches a temp of 315ish.
**Also you'll want to watch the color of the candy. It needs to be a golden amber color.

Chicken Cordon Bleu Casserole

Funny how the one day I make one of THE MOST AMAZING DINNERS EVER, the hubs is out of town working lol! Poor guy! I sent him pictures, and ranted on and on about how great this tasted. 
I pulled this meal together in about 25ish minuted minus the baking time. The first time I made it, I followed the directions exactly, it turned out so so, then tonight I made it again, (wanted to give it a second try) I tweaked the ingredients and with held some...I cant believe how great this turned out. The hubs comes back in 2 days, and I'm planing on making this again!


1 lb Rotisserie chicken shredded
1/2 lb sliced ham (lunch meat) chopped
8 slices swiss cheese
4 tabl butter
4 table flour
3 c milk
1 heaping tabl dijon mustard
1 1/2 tea salt
1/4 tea paprika
1/4 tea pepper
6 tabl butter
1 1/2 c panko
3/4 tea Lawry's seasoning salt
1 tea dried parsley

Heat your oven to 350.
While your oven is heating, begin making your sauce by melting the 4 tabl butter in a med sauce pan. Once melted add flour, whisk and cook for 1-2 min. Slowly whisk in your milk, add the mustard salt, paprika and pepper. Bring to a simmer and turn off once its thickened.
Sprinkle the chicken on the bottom of a 9 x 13" baking dish. Next evenly sprinkle the ham over, and layer with the sliced cheese. Pour the sauce over the cheese, making sure everything is completely covered (don't want anything getting jealous).
Next melt your butter in a dish in the microwave, add the Panko and stir well. Mix in the seasoning salt and parsley. Sprinkle evenly over the casserole and bake for 40 min. (top should be nice and golden)

Fall Acorn Treats

I've been trying to fine some cute Halloween/fall treats to make with my kids, and searching Pinterest I found these cute acorns. Now who doesn't love chocolate and peanut butter? It couldn't be more perfect! Let the seasonal pounds begin lol!


These were easy. My 3 year old helped me eat...I mean make them. The first time around I bought the large round nutter butter cookies, thinking they were the small bite size. Unfortunately those were too big, and didn't work, and we had to eat those (darn) and go on a search for the right size.
We slightly melted the flat parts of the chocolate kisses and pushed them on to the cookies. After we finished with all the cookies, we placed them into the fridge for 20 minutes to set.

All you need is nutter butter bites, chocolate kisses, chocolate chips, and someone to help eat them with you, preferable a cute 3 year old, but anyone will do.

You can store them (if there's any left over) in an air tight container when the chocolate has set. 

Jesus Story Book Bible

Thought I would share The Jesus Story Book Bible. I've been reading it to my kids for several years now, and have replaced it at least 4 times due to children and their special ways of destroying things.
My pastor have even taught from it, which was a great sermon about how God does what He does out of love for us.
Most my life, I had interpreted what I read from the bible about God to be an angry God, but honestly, after reading this book to my children, I have learned God did what He did out of great love for us! Its a humbling thing to learn such a huge lesson from my children story book bible.


The Magic Tree House Books


My daughter recently discovered The Magic Treehouse Books, and can't put them down. They're full of interesting stories to keep young minds entertained, and interested.
My daughter has had a difficult time finding books she likes, and hasn't really liked to read. But now is finding that reading is really fun, and she's been caught reading in her room, after activities, in the car...which makes this mama's heart happy. I thought she wasn't going to like reading, but I finally realized I just needed to find the right books that fit HER interest.
FYI the Magic Treehouse Books are typically for ages 7-12ish, if your looking for a specific age range.

Cookin Cookies

My kids love to bake, and they love to play board games...I thought this game Cookin' Cookies was perfect! My kids really enjoy this game, and I like it too since it takes around 5 minutes to play a game, and has been placed in our "Brain Breaks" bag, that we use to take a quick fun break from school to rest our minds.

Shepherding a Child's Heart

Thought I'd share another good book. This one's not so much for the kiddos, but for us moms and dads to read. I found it very helpful when it comes to raising children and disciplining them according to Gods way. Its tough to find a biblical sound book on parenting among the masses of parenting books on the subject, and in my opinion this book hit the spot. I feel more confident in my own parenting, and believe this book to be a great tool to have in home!

I would really love to hear your thought on this book if you have read it!

The Pumpkin Gospel!

I'm always trying to come up with ways to talk to my kiddos about Jesus. I was so lucky to find this book a few years back, we read it every year while carving pumpkins. Its a great way to include God's message during Halloween!


Homemade Play Dough!

We go through play dough like mad men! I like to take it our for the kids to play with while I'm busy making dinner, and somehow it rarely gets put back, and ends up drying out.
I searched around and tried out a few recipes before finding this one. Its obviously the one I like best...thats why I'm sharing it:) you can add your favorite extract, or essential oil to make a pretty smelling dough.

 You'll need:
1 c. Flour
1/2c. salt
1 tabl. oil
1 tabl. cream of tartar
1 c. water
food coloring
3-5 drops of your fav extract: coconut, vanilla, maple...

Mix together the dry ingredients in a non stick pot, stir in the liquid ingredients, and light the stove to medium heat. You'll want to stir constantly for 2-3 minutes until it forms a ball, then plop it on a clean surface and kneed it for a minute or so. It will be a little warm at this point so I suggest you do this, and let the kids watch. Place it in the frig for 5 min, and let the kids have at it! Give them some cookie cutters, play knives, popsicle sticks, rolling pins, and anything else you use to play with play dough!
When they're finished, place it in a zip lock, and store for later use!
I'll have to remember to post a picture next time I make it.